Most Scenic Route on Mount Kilimanjaro for Photography: Capture the Ultimate Adventure
Mount Kilimanjaro, the highest peak in Africa, rising to 5,895 meters (19,341 feet), is not just a climber’s dream but also a paradise for photographers. Its unique combination of lush forests, alpine deserts, volcanic landscapes, glaciers, and panoramic vistas makes every step a potential photograph waiting to be taken. However, the route you choose can significantly influence the photographic opportunities and scenic variety you experience.
In this guide, we’ll explore the most scenic Kilimanjaro routes for photography, including what makes them visually stunning, ideal timing for capturing light and landscapes, and insider tips to get the perfect shot.
Why Route Choice Matters for Photography
While all Kilimanjaro routes offer breathtaking scenery, certain routes are more photogenic because of their diversity, elevation changes, and viewpoints. Photographers should consider:
- Landscape Variety – From dense tropical rainforest to the stark alpine desert and icy glaciers.
- Altitude Gain Timing – Routes that allow gradual acclimatization let you pause for photos without rushing.
- Unique Vistas – Peaks, crater edges, valleys, and snow-capped ridges provide iconic frames.
- Sunrise & Sunset Spots – Some routes expose you to dramatic lighting ideal for photography.
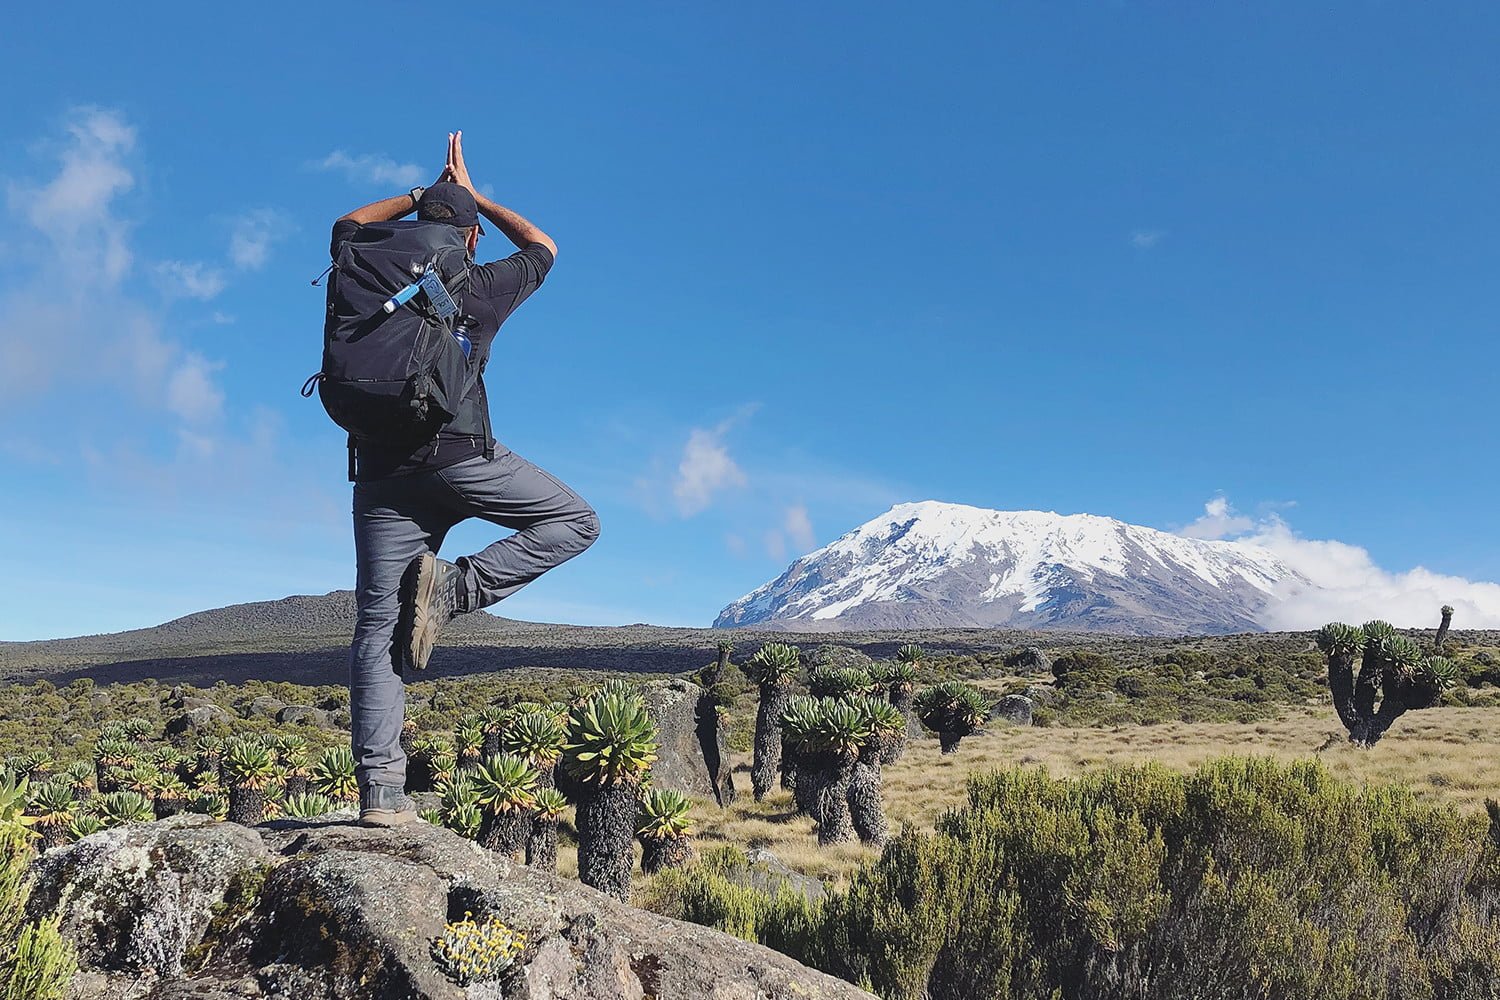
- Wildlife & Flora – Lower forested zones feature monkeys, birds, and giant groundsel plants, perfect for macro and wildlife photography.
Overview of Kilimanjaro Routes and Scenic Potential
Mount Kilimanjaro has seven main trekking routes, each with different terrain, scenery, and difficulty levels. Here’s a breakdown focusing on their photographic potential:
- Lemosho Route – The Photographer’s Paradise
Length: 8–9 days
Difficulty: Moderate to Challenging
Scenic Highlights:
- Expansive rainforest with lush greenery and waterfalls.
- Shira Plateau with panoramic views of Kibo and Mawenzi peaks.
- Spectacular sunsets and sunrises over the plateau.
- Less crowded, so unobstructed landscapes for photography.
Photography Tips:
- Use wide-angle lenses to capture the sweeping Shira Plateau.
- Early morning mist in the rainforest creates atmospheric shots.
- Capture silhouette shots of climbers against Kibo at sunrise.
Why Lemosho is Best for Photography:
The Lemosho route offers the longest approach through pristine forests and remote plateaus. Its varied landscape makes every day visually unique, giving photographers the richest opportunities.
- Rongai Route – Northern Exposure
Length: 6–7 days
Difficulty: Moderate
Scenic Highlights:
- Approaches from the north, providing unique perspectives of Kilimanjaro’s peak.
- Drier, arid landscapes contrast with the rainforest routes.
- Excellent views of Mawenzi and Kibo peaks from less-trodden northern paths.
Photography Tips:
- Early morning light enhances the textures of volcanic ridges.
- Capture panoramic shots across Kenya plains on clear days.
- Sunset over the north side is dramatic due to sparse vegetation.
Best for Photographers:
Rongai’s northern approach is perfect for capturing Kilimanjaro in a different light, away from the more crowded southern side.
- Machame Route – Dramatic Landscapes and Iconic Views
Length: 7–8 days
Difficulty: Challenging
Scenic Highlights:
- Rainforest entry and scenic waterfalls.
- Steep ascents offering dramatic mountain vistas.
- Lava Tower and Barranco Wall provide rugged photographic backdrops.
Photography Tips:
Barranco Wall sunrise creates dramatic shadow lines.
Lava Tower offers volcanic textures and panoramic shots.
Use ND filters for waterfalls in rainforest sections.
Why Machame is Popular Among Photographers:
The route’s steep climbs reward you with jaw-dropping viewpoints, ideal for dramatic landscape photography.
- Northern Circuit Route – The Ultimate Panoramic Trek
Length: 9–10 days
Difficulty: Moderate to Challenging
Scenic Highlights:
- Longest route around the northern slopes, offering complete panoramic views.
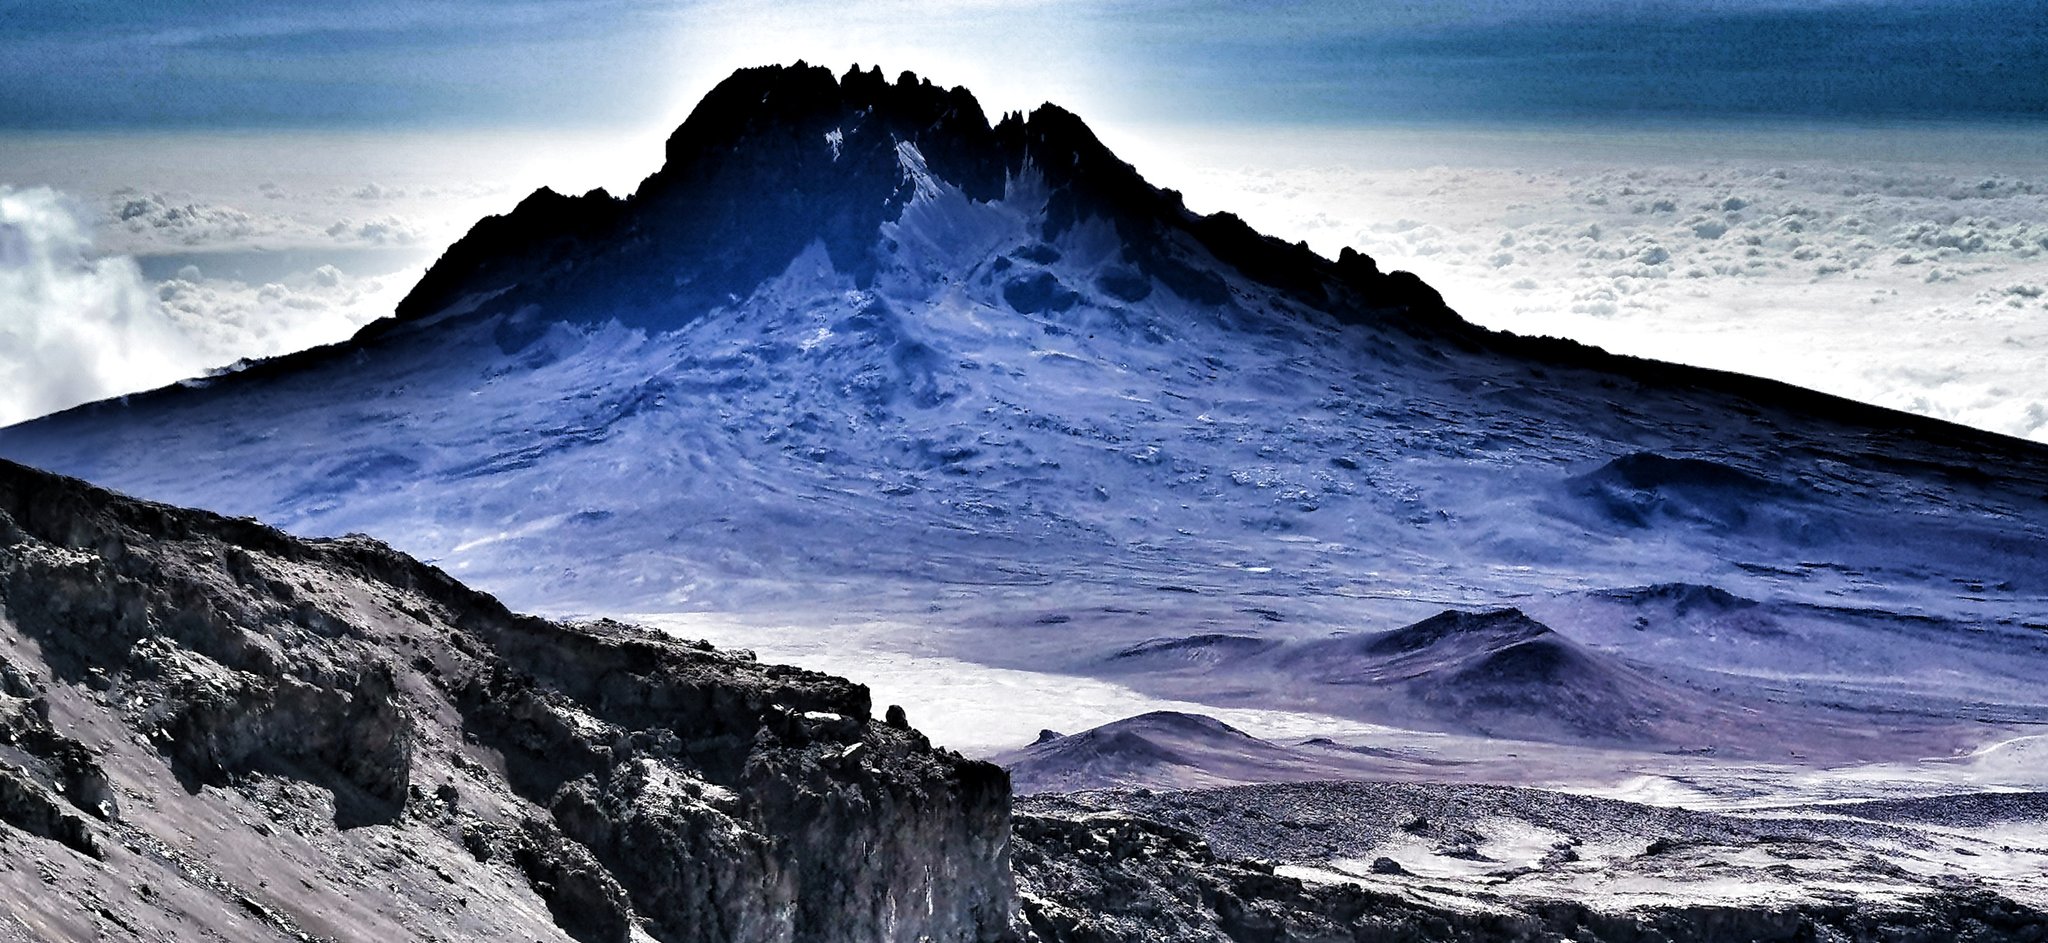
- Glacial landscapes at higher elevations for stark, icy imagery.
- Fewer crowds, making it easier to photograph pristine landscapes.
Photography Tips:
Golden hour photography at Lava Tower and Shira Plateau is unmissable.
Use telephoto lenses to capture glaciers and distant peaks.
Night photography of stars is excellent due to remote, low-light areas.
Best for Photographers Seeking Variety:
Northern Circuit offers the ultimate combination of forest, plateau, alpine desert, and glacial photography opportunities.
- Umbwe Route – Rugged and Raw
Length: 6–7 days
Difficulty: Very Challenging
Scenic Highlights:
- Steep, rugged terrain with dramatic cliff-side vistas.
- Close-up views of Mawenzi peak.
- Less-crowded, raw wilderness photography opportunities.
Photography Tips:
Ideal for action shots of climbers navigating cliffs.
Capture unique rock formations and volcanic textures.
Use drones (where permitted) for dramatic aerial photography.
Why Umbwe Appeals to Adventure Photographers:
It’s short, steep, and remote, providing unique angles of Kilimanjaro that other routes can’t match.
Comparing Routes for Photographic Diversity
Route
Duration
Best Photography Zone
Landscape Variety
Crowd Factor
Iconic Shots
Lemosho
8–9 days
Shira Plateau, Forest
Rainforest → Alpine Desert → Glaciers
Low
Sunset silhouettes, Shira Plateaus
Rongai
6–7 days
Northern Approach
Arid → Glaciers
Low
Kilimanjaro from Kenya side
Machame
7–8 days
Barranco Wall, Lava Tower
Rainforest → Volcanic Landscapes
Medium
Lava Tower, Barranco shadow shots
Northern Circuit
9–10 days
Entire Northern Slopes
Forest → Plateaus → Alpine Desert → Glaciers
Low
Panoramic mountain vistas
Umbwe
6–7 days
Mawenzi Cliffs
Rugged Cliffs
Very Low
Cliffside dramatic shots
Photography Gear Recommendations
For serious photography on Kilimanjaro, preparation is crucial:
Cameras & Lenses:
DSLR or Mirrorless with wide-angle (16–35mm) and telephoto (70–200mm).
Lightweight prime lens for low-light and sunrise/sunset shots.
Tripod:
Essential for night photography and sunrise/sunset long exposures.
Filters:
ND filters for waterfalls and motion blur effects.
Polarizer to enhance sky contrast and reduce glare.
Drones:
Optional but allows capturing aerial perspectives of plateaus and glaciers.
Must comply with park rules.
Accessories:
Extra batteries (cold drains power quickly at high altitude).
Protective lens covers and waterproof bags for misty rainforest areas.
Best Time for Photographic Conditions
January – March: Clear skies, dry trails, excellent visibility for panoramic shots.
June – October: Dry season with vibrant sunrise and sunset lighting.
Avoid April – May & November: Rainy season limits visibility and may make trails slippery.
Insider Photography Tips
- Start Early: Golden hours provide the most dramatic lighting.
- Scout Locations: Spend extra time at Shira Plateau, Lava Tower, Barranco Wall, and Uhuru Peak for unique angles.
- Focus on Layers: Include foreground, mid-ground, and background to give depth to your shots.
- Capture the Climbers: Photos including fellow trekkers add scale and storytelling.
- Night Photography: The high-altitude clear skies provide spectacular star trails over Kilimanjaro.
Conclusion: Choosing the Most Scenic Route
For photographers seeking the ultimate visual journey, the Lemosho Route and Northern Circuit Route stand out. They combine rich biodiversity, dramatic landscapes, high-altitude glaciers, and minimal crowds—perfect for capturing Kilimanjaro in all its glory. For adventure photographers seeking rugged, dramatic angles, the Umbwe Route is unparalleled, while Machame offers iconic steep climbs with stunning views.
Every route has its photographic charm, but careful planning, timing, and gear preparation will ensure you return not just with memories, but with breathtaking images that tell the story of Africa’s highest peak.
Day by Day Itinerary
Day 1: Hotel to Machame Camp
Drive from Moshi to Machame Gate takes about 45 minutes. The journey passes through the village of Machame which is located on the lower slopes of the mountain.
We depart the park gate and walk through the rain forest on a winding trail up a ridge. At lower elevations the trail can be muddy and slippery. Gaiters and trekking poles are a good idea here. We continue a short distance until we reach the Machame Camp.
Elevation: 1830m/6000ft to 3050m/9950ft
Distance: 11km/7mi
Hiking Time: 5-6 hours
Habitat: Montane Forest
Meals: Lunch and Dinner
Day 2: Machame Camp to Shira Camp
After breakfast we leave the glades of the rain forest and continue on an ascending path, crossing the valley along a steep rocky ridge. The route now turns west onto a river gorge until we arrive at the Shira campsite.
Elevation: 3050m/9950ft to 3850m/12,600ft
Distance: 5km/3mi
Walking Time: 4-5 hours
Habitat: Moorland
Meals: Breakfast, Lunch and Dinner
Day 3: Shira Camp to Lava Tower to Barranco Camp
From the Shira Plateau we continue to the east up a ridge, passing the junction towards the peak of Kibo. As we continue, our direction changes to the South East towards the Lava Tower, called the “Shark’s Tooth” (elevation 4650m/15,250ft). Shortly after the tower we come to the second junction which goes to the Arrow Glacier. We now continue down to the Barranco Camp. Although you end the day around the same elevation as when you began, this day is very important for acclimatization and will help your body prepare for summit day.
Elevation: 3850m/12,600ft to 4000m/13,000ft
Distance: 10km/6mi
Walking Time: 5-6 hours
Habitat: Semi-desert
Meals: Breakfast, Lunch and Dinner
Day 4: Barranco Camp to Karanga Camp
After breakfast, we leave Barranco and continue on a steep ridge up the Barranco Wall to the Karanga Valley and the junction which connects with the Mweka Trail.
Elevation: 4000m/13,000ft to 4050m/13,250ft
Distance: 5km/3mi
Climbing Time: 3-4 hours
Habitat: Alpine Desert
Meals: Breakfast, Lunch and Dinner
Day 5: Karanga Camp to Barafu Camp
we continue up to the Barafu Camp. You have completed the South Circuit, which offers views of the summit from many different angles. Here we make camp, rest, enjoy dinner, and prepare for the summit day.
Elevation: 4050m/13,250ft to 4700m/15,350ft
Distance: 4km/2mi
Climbing Time: 3-4 hours
Habitat: Alpine Desert
Meals: Breakfast, Lunch and Dinner
Day 6: Barafu Camp to Summit to Mweka Camp
Very early in the morning (midnight to 2 am), we continue our way to the summit between the Rebmann and Ratzel glaciers. You head in a northwesterly direction and ascend through heavy scree towards Stella Point on the crater rim. This is the most mentally and physically challenging portion of the trek. At Stella Point you will stop for a short rest and will be rewarded with the most magnificent sunrise you are ever likely to see. Faster hikers may view the sunrise from the summit.
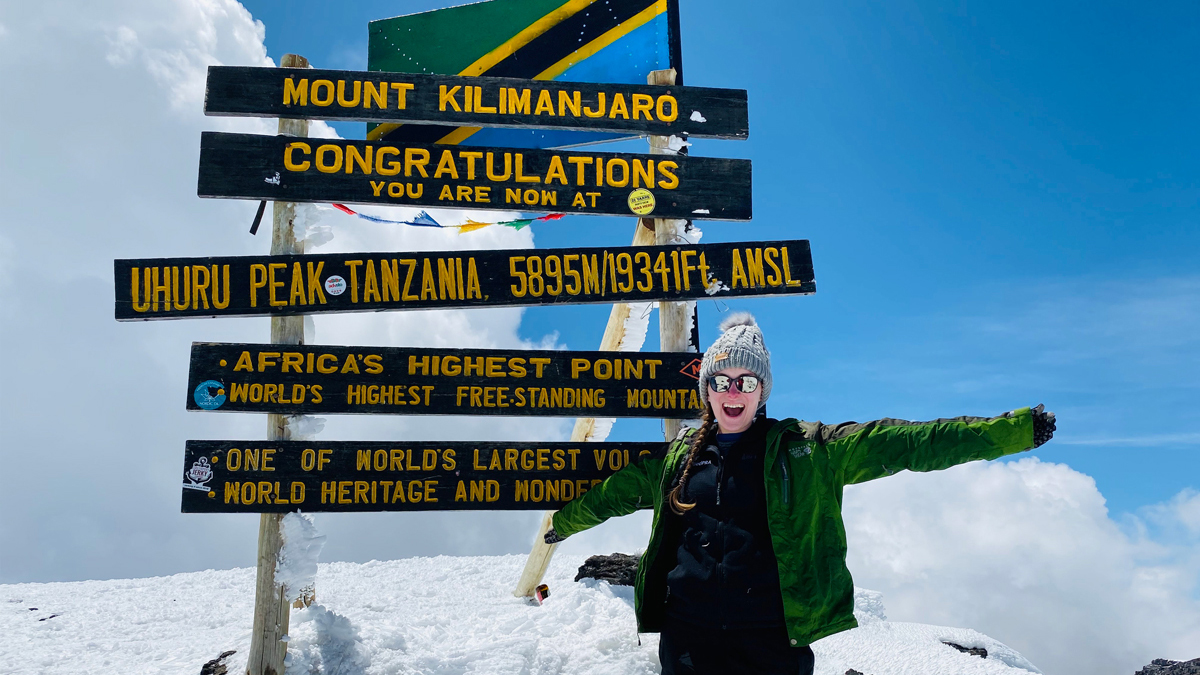
From Stella Point, you may encounter snow all the way on your 1-hour ascent to the summit. Once at Uhuru Peak you have reached the highest point on Mount Kilimanjaro and the continent of Africa!
From the summit we begin our descent by continuing straight down to the Mweka Camp, stopping at Barafu for lunch. You may want gaiters and trekking poles for the loose gravel going down. We arrive at Mweka Camp and enjoy our last evening on the mountain.
Elevation: 4700m/15,350ft to 5895m/19,340ft
Down to 3090m/10,150ft
Distance: 5km/3mi up / 13km/8mi down
Hiking Time: 5-7 hours up / 5-6 hours down
Habitat: Stone scree and ice-capped summit
Meals: Breakfast, Lunch and Dinner
Day 7: Mweka Camp to Mweka Gate to Hotel
After breakfast we continue the descent down to the Mweka Park Gate to receive your summit certificates. At lower elevations, it can be wet and muddy. Gaiters and trekking poles will help. Shorts and t-shirts will probably be plenty to wear (keep rain gear and warmer clothing handy).
Elevation: 3090m/10,150ft to 1680m/5500ft
Distance: 10km/6mi
Hiking Time: 3-4 hours
Habitat: Forest
Meals: Breakfast